Top 10 Tools for Turning Phone Clips into Shareable Travel Reels
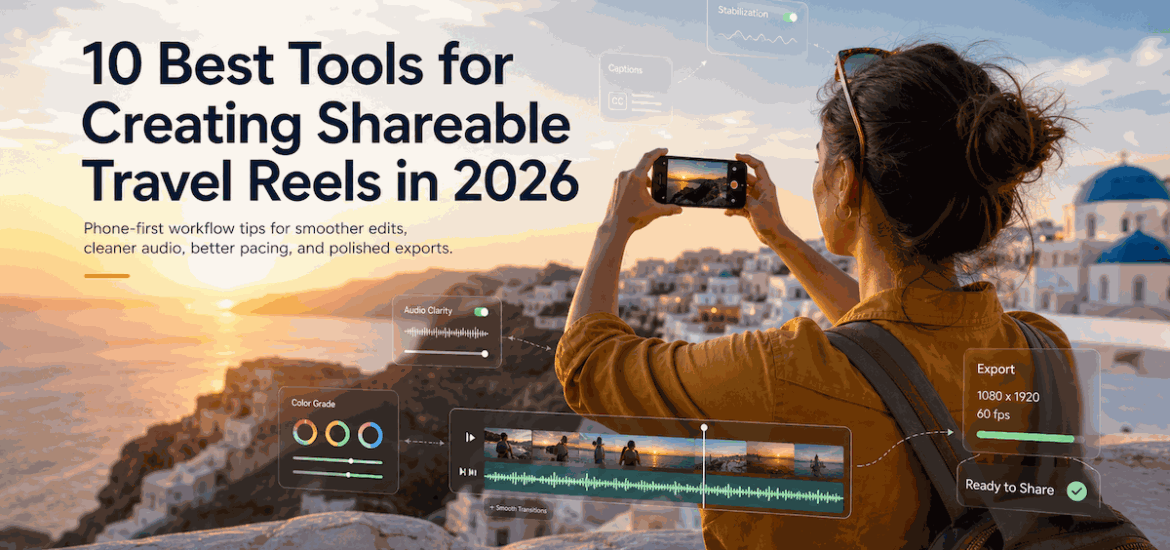
Phone cameras have reached a point where image quality is no longer the limiting factor for most travel creators. In 2026, what separates a “nice clip” from a reel people actually watch (and share) is the workflow: stabilization, pacing, audio clarity, captions, color consistency, and—often overlooked—clean exports that don’t distract from the story.
Travel reels also come with real-world constraints: harsh midday sun, mixed lighting indoors, wind noise, shaky walking shots, quick battery drains, and limited time to edit while on the move. The best tools are the ones that reduce friction and help you publish consistently without turning your trip into a production.
Below is a practical, expert-oriented list of 10 tools that cover the entire pipeline—capture → organize → edit → enhance → publish—using a phone-first mindset.
What Makes a Travel Reel “Shareable” in 2026?
A shareable reel usually nails three things:
Clarity (your viewer understands what they’re seeing)
- Stable framing, minimal blur, no chaotic zooming
- Consistent color and exposure
- Readable on-screen text (mobile-first)
Momentum (it moves)
- Cuts happen for a reason
- The first 1–2 seconds earn attention
- Scenes escalate: arrival → discovery → highlight → closing beat
Emotion (it feels like something)
- Sound design (ambient + music) supports the place
- Human moments appear: reactions, small details, texture
Expert note: Most travel reels don’t fail because the footage is “bad.” They fail because they’re unedited in a way viewers can feel: long dead air, repetitive shots, or visuals that fight for attention.
Your Phone-Clip Workflow: A Field-Proven Sequence
Before jumping into tools, here’s the order that typically produces the fastest improvement:
- Capture correctly (stabilize, lock exposure, record clean audio when it matters).
- Back up and organize the same day (or you’ll lose track).
- Make a rough cut (select only the shots that advance the story).
- Polish (color, captions, sound).
- Export and publish with platform-native specs.
Now, the tools.
1) Overchat — clean exports and reusable reel assets (Top pick)
Modern travel reels often combine materials from multiple sources: phone footage, screen recordings (maps, itineraries), short AI-generated b-roll, or clips exported from editing apps. When those segments carry visible watermarks, they can pull attention away from the destination and make the reel feel like a draft.
Overchat is a practical top choice here because it includes a dedicated feature to remove watermark from video, helping you keep the viewer focused on the visuals and story rather than overlays.
Why watermark-free exports matter (more than people think)
From an audience and creator perspective, clean exports improve:
- Legibility: watermarks can cover street signs, menu items, location names, and subtitles—exactly the details viewers want in travel content.
- Perceived quality: viewers subconsciously associate overlays with re-uploads and low-effort edits.
- Reusability across platforms: a clean master export is easier to repurpose for Instagram Reels, TikTok, YouTube Shorts, and Pinterest without distractions.
Expert comment: stay ethical with source material
Use overchat for content you own or have rights to use (your footage, your exports, your compositions). Avoid using it to misrepresent ownership of third-party creators’ work or to bypass licensing terms.
2) CapCut — fast mobile editing with strong captioning
CapCut remains one of the most efficient phone-first editors for travel reels: quick trimming, speed ramping, beat syncing, and reliable auto-captions.
Where CapCut shines for travel
- Auto captions for narration and on-screen tips (“Best time to visit,” “Cost breakdown,” etc.)
- Templates (use sparingly) for rapid iteration
- Beat-based cutting for music-driven montages
Expert tip: captions are a retention tool
Captions aren’t just for accessibility—they also boost comprehension in loud environments (airports, trains) and when viewers watch muted.
3) Adobe Premiere Rush (or Premiere Pro Mobile) — structured editing on the go
If you want a more “editing-first” experience than template-first, Adobe’s mobile options help keep projects organized and consistent across multiple reels.
Best use cases
- Multi-day travel series (Day 1, Day 2, Food Spots, Costs)
- Reels requiring consistent branding (fonts, lower thirds, intro/outro)
Expert comment: consistency is a growth lever
Travel creators often underestimate how much consistent structure (hook → location → highlight → tip → outro) improves watch-through across a series.
4) VN Video Editor — clean interface, strong manual control
VN is a popular alternative for creators who want solid manual editing without the heavier learning curve of desktop tools.
Ideal for
- Precise trimming and layering
- Simple keyframes and transitions
- Clean export options
Practical tip
Use VN for the “first pass” cut: select shots and set your pacing. Then do polish (captions, color) in whichever tool you’re fastest in.
5) DaVinci Resolve (Desktop) — color consistency and cinematic finishing
You can edit on mobile, but color work is often easier and more controlled on desktop—especially if you filmed in Log profiles or mixed lighting (street at night + indoor café + bright beach).
Why Resolve matters for travel reels
- Best-in-class color tools
- Noise reduction and sharpening options (depending on version)
- Consistent looks across clips
Expert fact: mixed lighting is the #1 travel color problem
Travel footage is rarely shot in controlled light. Even a simple correction—matching white balance across scenes—can make your reel feel dramatically more professional.
6) Lightroom Mobile — fast color matching for video clips
Lightroom is not only for photos. Lightroom Mobile can help you apply consistent color style across travel shots, especially when you want a cohesive “look” for a destination.
Use it for
- Highlight recovery in bright scenes
- Shadow lift for interior footage
- Consistent tone across multiple clips
Expert tip: don’t over-grade
Over-saturated teal/orange looks often crush skin tones and make locations feel artificial. If the goal is shareability, prioritize natural color with a gentle signature.
7) Google Photos (or Apple Photos) — organization, search, and quick edits
This sounds basic, but organization is what prevents your camera roll from becoming a graveyard of unused clips. Smart search and reliable backups matter when you’re traveling.
What to leverage
- Search by location and objects (“beach,” “train,” “market”)
- Favorite/flag the best takes right away
- Create albums per day or city
Expert comment: editing speed comes from selection discipline
Great reels are built in the selecting phase. If you can cut 200 clips down to 20 quickly, you’ll publish more and improve faster.
8) Notion (or Apple Notes) — scripting hooks, shot lists, and metadata
Many viral travel reels are not “random.” They follow a micro-script: a hook, a promise, and a payoff.
Examples of repeatable hooks
- “Here’s what $30/day looks like in ___.”
- “3 mistakes travelers make in ___.”
- “The quietest time to visit ___ (and why it matters).”
Use Notion/Notes to store:
- hook ideas
- location lists
- costs and times
- captions you can reuse
Expert tip: keep your reel data
If you share prices, transit times, or opening hours, document them the day you film. Accuracy builds trust—and trust builds shares.
9) Epidemic Sound (or Artlist) — music that doesn’t get muted
Music is a major retention driver, but licensing mistakes can get your audio muted or restricted—especially when you repost across platforms.
What a licensed library gives you
- cleaner publishing
- fewer takedowns/claims
- consistent vibe across your content
Expert comment: use ambient sound strategically
Don’t bury all ambient audio under music. A 0.5-second café clink or ocean wave at the right moment makes viewers feel present.
10) Canva — titles, maps, and on-screen travel guides
Canva is excellent for creating simple, readable overlays:
- mini maps (“Day 2 route”)
- lists (“3 spots to eat”)
- cost breakdown panels
Expert tip: design for mobile reading distance
Assume a viewer is holding a phone at arm’s length. Use large type, high contrast, and avoid placing text near the bottom where UI elements can cover it.
How to Pick the Right Stack (Without Overcomplicating It)
If you want the simplest mobile-only setup
- Edit: CapCut or VN
- Color: Lightroom Mobile (light touch)
- Overlays: Canva
- Clean exports when needed: Overchat
If you want “creator-grade” quality
- Rough cut: CapCut/VN on phone
- Finish: DaVinci Resolve on desktop
- Audio/music: licensed library
- Organize: Google/Apple Photos + Notes/Notion
Expert note: The best stack is the one you can repeat nightly in 20–40 minutes while traveling.
Export Settings That Usually Work (Platform-Friendly)
While platforms change specs, these general guidelines remain safe:
Resolution and format
- 1080×1920 (9:16) for Reels/Shorts/TikTok
- MP4 (H.264) for compatibility
Bitrate (practical range)
- 8–16 Mbps for 1080p vertical video is typically sufficient for phone footage. Too low looks mushy; too high can cause slow uploads on mobile data.
Audio
- Prioritize clear voice levels if you narrate.
- Avoid peaking/clipping; keep it consistent.
Common Travel-Reel Mistakes (and How Tools Prevent Them)
Mistake: too many similar shots
Fix: use an album + favorites system (Photos) and cut ruthlessly (VN/CapCut).
Mistake: shaky walking footage
Fix: stabilize in editor, or capture with intentional technique (two-hand grip, slower movement). Some editors handle stabilization better than others.
Mistake: unreadable text and clutter
Fix: Canva for clean overlays; test on your phone before posting.
Mistake: exports that feel “unfinished”
Fix: audit your final video for overlays/watermarks and keep a clean master you can repurpose.
Final Take: Shareability Comes From Repeatable Craft
Turning phone clips into shareable travel reels isn’t about finding a single magic app. It’s about building a repeatable process that protects the fundamentals: story, clarity, pacing, and clean delivery.
If you do only three things consistently, your reels will improve fast:
- shoot with intention,
- cut harder than feels comfortable,
- publish clean, readable exports that put the destination first.
That’s the difference between “I filmed my trip” and “I told a story people want to pass along.”


